How to Build an Interior Partition Wall in Revit Family
Revit's family editor provides a powerful tool for creating reusable, customizable components like interior partition walls. This article provides a step-by-step guide on building an interior partition wall family in Revit, enabling you to create consistent and efficient building designs.
Step 1: Creating the Family Template
Begin by creating a new family template. Open Revit and navigate to the "New" tab. Select "Family" and choose an appropriate template, such as "Generic Model." In the "Family Category" dialog box, select "Walls" and then "Interior Walls." This step ensures that the created family will be recognized as an interior partition wall within the project.
Step 2: Defining the Wall Structure
Once the template is loaded, you can define the wall structure using reference planes. Create vertical reference planes to define the wall thickness and position. These planes will act as the boundaries of the wall. Use the "Line" tool to draw the horizontal reference planes that will define the height of the wall. The reference planes should be placed according to the desired wall dimensions.
Next, create the wall material. Use the "Wall" tool and select the desired material from the "Material Browser." Apply the selected material to the wall structure created by the reference planes. You can adjust the thickness and material properties as needed. For example, you can add multiple layers of material to create a more complex wall structure.
Step 3: Adding Doors and Windows
For common wall configurations, you can include doors and windows within the family template. Use the "Door" and "Window" tools to place these components onto the wall structure. Make sure to align them with the reference planes and use the appropriate dimensions. You can also create separate families for doors and windows and incorporate them within the wall family using nesting. This approach provides greater flexibility and control over the final design.
Step 4: Defining Parameters
Revit enables you to control the behavior of the family using parameters. Parameters allow you to adjust the dimensions and properties of the wall during placement in a project. Start by creating a "Type Parameter" for the wall family. This parameter can define the thickness, height, or other properties of the wall. You can also add "Instance Parameters" that control specific aspects of the wall, such as the position of openings or the material used.
Link the parameters to the corresponding elements in the family. For example, link the wall thickness parameter to the distance between the reference planes. This ensures that the wall thickness updates automatically when a new value is assigned to the parameter.
Step 5: Creating Family Types
Once the basic wall family is defined, you can create multiple "Family Types" within the family template. Family types allow you to define variations of the wall with different properties. For example, you can create a type for a 4-inch thick wall and another type for a 6-inch thick wall. Each type can have distinct material combinations, door and window configurations, and parameters. This approach provides a flexible and efficient way to manage different wall variations within a project.
Step 6: Loading the Family into the Project
After creating and refining the family, save it and load it into your project. From the "Insert" tab select "Load Family" and choose the saved family file. The family will appear in the "Project Browser" under the "Families" section. You can now place the wall family in your project using the "Wall" tool and select the desired type from the "Type Selector." The different family types you created will be available for selection, allowing you to place the specific variation of the wall that suits your design needs.
The process of creating a custom interior partition wall family in Revit facilitates the creation of consistent and efficient building models. This method allows you to create reusable and customizable components that can be easily adapted to different design requirements, improving the workflow and quality of your projects.

Revit Quick Tip The Partition Wall Method No Talks About

How To Create Interior Wall Partition In Revit

Revit Tutorial Stud Wall With Framework Door

How To Frame Interior Metal Wood Stud Wall In Revit Tutorial Dry Framework With Doors Windows

How To Model A Decorative Partition Wall In Revit

Wall Partition Terminations Revit 2024 Professional Office Interior Design

Constructing Walls In Revit Evstudio

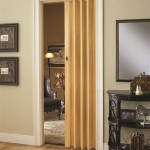
Partition Folding In Revit Free 180 00 Kb Library

Panel Celosia Interior Madera Revit Wood Wall Bimshares

Revit Families Bim Objects Of Walls And Partitions Free


