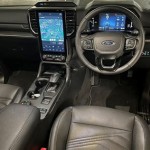
Essential Aspects of Car Interior Light Strips Installation
Enhance the ambiance and visibility within your vehicle's interior with the thoughtful installation of car interior light strips. These versatile and affordable accessories offer a range of benefits, including improved visibility, a more inviting atmosphere, and enhanced safety. However, meticulous attention to proper installation techniques is crucial to ensure optimal performance and durability.
Selecting Compatible Light Strips:
The first step involves choosing light strips that are compatible with your vehicle's electrical system and interior dimensions. Consider the length, color temperature, and voltage requirements to ensure compatibility. Opt for strips with waterproof and heat-resistant qualities for long-lasting performance in the vehicle's interior environment.
Planning the Placement:
Determine the strategic placement of the light strips to achieve the desired lighting effects. Common areas for installation include under the dashboard, along the footwells, inside door panels, and within cup holders. Sketch out the desired layout before installation to optimize light distribution and minimize wiring difficulties.
Preparing the Surface:
To ensure secure adhesion, thoroughly clean the surfaces where the light strips will be attached. Remove any dirt, dust, or oils using a mild detergent or rubbing alcohol. Allow the surfaces to dry completely before proceeding with the installation.
Installing the Strips:
Attach the light strips to the prepared surfaces using the provided adhesive backing or mounting clips. Firmly press the strips into place and ensure they are securely fixed to prevent detachment or interference with vehicle components. Connect the wires according to the manufacturer's instructions, ensuring polarity is correct to avoid damage to the strips.
Connecting to the Power Source:
Carefully connect the light strips to the vehicle's electrical system. Identify a suitable power source, such as the fuse box or an existing interior light fixture, to draw power from. Verify the voltage compatibility between the light strips and the power source before connecting them.
Testing and Finishing:
Once the installation is complete, turn on the light strips to verify their functionality and adjust the brightness or color settings as desired. Inspect the wiring connections for any loose or damaged wires that could lead to electrical issues. Conceal any visible wires or connectors using electrical tape or wire looms for a clean and professional finish.
By adhering to these essential aspects, you can ensure a successful car interior light strips installation that enhances the ambiance, visibility, and safety within your vehicle. Enjoy the benefits of a well-lit interior while ensuring optimal performance and durability with meticulous attention to installation techniques.

How To Install Led Strip Lights In Car

How To Install Rgb Bluetooth Control Led Strips In Car

Car Led Lighting Kit Install Review Rgb

Can The Led Strip Lights Use For Car Interior

How To Install Led Light Strips In A Car Sound Certified

How To Install Car Interior Rgb Led Strip Lights

Govee Car Light Strips Installation How To Install Interior

Ultimate Guide Install Led Strip Lights In Your Car Easily

Mictuning Interior Car Led Strip Lights Rgb 8 In 1 Neon Ambient Lighting Kits With 400 Inches Fiber Optic Tubing

Interior Led Light Installation Services For Cars Tint World


